转载自:
原文章网址:https://gamebanana.com/tuts/19096
原作者Denwarenji
Submitted:Fri, Sep 26 2025 6:36 PM GMT
Modified:Fri,Oct 3 20252:48PM GMT
Introduction 简介
Have you ever thought about making your own mods, but felt too intimidated by its barrier of entry? This guide is exactly for you.
你是否曾经想过自己制作模组,却因为入门门槛而感到有些畏惧?本指南正是为你准备的。
Hi! I’ve been modding Wuthering Waves for a year now, and also used to mod Genshin for a few years before that. You might have seen my mods already, and I hope the increase of their quality will serve as proof that I’ve learned a lot about both modding and 3D art during this time.
你好!我已经有了一年的 Wuthering Waves 模组制作经验,之前还曾制作过几年的 Genshin 模组。你可能已经见过我的模组了,我希望它们质量的提升能够证明在这段时间里,我在模组制作和 3D 艺术方面学到了很多。
Since my modding career will come to an end eventually, I wanted to make a tutorial for those who would like to start modding, but perhaps find all the tutorials out there a bit too hard to swallow for a run-of-the-mill user. I intend to make this as digestible as possible, and like a great man once said as a red lightning struck his mechanical arm: For those who come after.
由于我的模组制作生涯终将结束,我想为那些想开始模组制作但可能觉得现有教程对普通用户来说有些难以消化的人制作一个教程。我打算尽可能让这个教程易于理解,就像一位伟大的人曾经在雷电击中他的机械臂时所说的一样:“给后来的人。”
This guide will cover essential concepts such as Blender basics applied to modding, dumping and extracting models, importing and exporting objects, and a simple model replacement walkthrough; all neatly organized and condensed so that you can go straight to the point.
本指南将涵盖模组制作中的一些基本概念,如 Blender 基础操作、模型导出与提取、对象导入与导出,以及一个简单的模型替换教程;所有内容都经过精心组织和浓缩,以便你可以直接进入主题。
Keep in mind that Blender is a very complex program, so, while I hope this guide will smoothen your learning curve, there is some effort required to make the most of it. But don’t feel discouraged; that’s also part of the fun. And if I can help you find out that this is not something you enjoy, that’s great too!
请记住,Blender 是一个非常复杂的程序,因此,虽然我希望本指南能帮助你更轻松地学习,但要充分利用它仍需要一些努力。但不要气馁;这也是其中的乐趣之一。而且,如果你能帮助你发现这并不是你感兴趣的事情,那也是很好的!
Without further ado, let’s get right into it. And remember to pay full attention to every step!!
不用再多说了,我们直接开始吧。请记住要全神贯注于每一步!!
Prerequisites 前提条件
- WWMI (obviously) WWMI(显然)
- Blender + WWMI tools: Make sure that you’re using a version of Blender that is compatible with the latest version of WWMI Tools (follow these steps to install).
Blender + WWMI 工具: 确保你使用的是与最新版本的 WWMI 工具兼容的 Blender 版本(请按照以下步骤进行安装)。 - Photoshop. Of course you have to pay the official license. I sure did. Don’t look in those sites for free apps… ahem, free APPs… in DOZEns of sites… all over the interNET…
Photoshop。当然你必须购买官方许可证。我确实买了。不要去那些网站寻找免费软件……啊,免费的 APP……成百上千的网站……遍布整个互联网…… - Intel DDS plugin for Photoshop: required for importing DDS images into Photoshop.
Photoshop 的 Intel DDS 插件: 用于将 DDS 图像导入 Photoshop。 - Instructions: 说明:
- Copy IntelTextureWorks.8bi in “Plugins\x64” and paste it in “[your photoshop folder]\Required\Plug-Ins\File Formats”
复制 “Plugins\x64” 中的 IntelTextureWorks.8bi 并粘贴到 “[your photoshop folder]\Required\Plug-Ins\File Formats” - Copy the two files in “PhotoshopScripts” and paste them in “[your photoshop folder]\Presets\Scripts”
复制 “PhotoshopScripts” 中的两个文件并粘贴到 “[your photoshop folder]\Presets\Scripts”
- Copy IntelTextureWorks.8bi in “Plugins\x64” and paste it in “[your photoshop folder]\Required\Plug-Ins\File Formats”
- MMD Tools: addon to import MMD models into Blender. Required if you’re thinking about using any models from other games (PGR, ToF, Snowbreak, etc.) officially distributed via Aplaybox.
MMD Tools: 用于将 MMD 模型导入 Blender 的插件。如果你打算使用其他游戏(PGR、ToF、Snowbreak 等)通过 Aplaybox 官方分发的模型,此插件是必需的。
Blender for dummies
Open Blender and click anywhere outside the pop-up menu to close it.
打开 Blender 并点击弹出菜单外的任何位置以关闭它。
Settings 设置
On the upper left corner of the screen, click on Edit > Preferences. Then:
在屏幕左上角,点击编辑 > 首选项。然后:
- Interface > Display: Change the resolution scale to a value that you feel comfortable with.
界面 > 显示:将分辨率比例调整为你感到舒适的数值。 - System > Memory & Limits: Turn Undo Steps to the max. This will allow you to undo a lot more steps… And hopefully save you some anxiety whenever you get too careless.
系统 > 内存与限制:将撤销步骤设置为最大。这将允许你撤销更多的操作… 希望在你过于粗心时能帮你缓解一些焦虑。 - Keymap: Search for ‘Weight Paint Sample Group’ and change the key binding to [Shift + Right click]. You’ll probably use this a lot in the future, so it’s better to have easy access to it.
快捷键:搜索 ‘Weight Paint Sample Group’ 并将快捷键绑定更改为 [Shift + 右键点击]。你将来可能会经常使用这个功能,所以最好能方便地调用它。
Basic features 基础功能

This is what you’ll see upon creating a new general project. I know it can be overwhelming for a beginner, so let’s take baby steps.
这是创建一个新通用项目后你将看到的画面。我知道对于初学者来说这可能会显得令人不知所措,所以让我们一步一步来。
Right now, you are in the 3D viewport, in Object mode. The viewport is the space where you can interact with 3D objects, and Object mode is where you select a mesh to then go into other modes, like Edit mode. You don’t want to do a lot in this mode, but first, let’s familiarize ourselves with the basic controls:
现在,你处于 3D 视图窗口中,处于对象模式。视图窗口是你与 3D 对象进行交互的空间,而对象模式是你选择网格后进入其他模式(如编辑模式)的起点。你不想在这个模式下做太多操作,但首先,让我们熟悉一些基本的控制:
- [Middle mouse button]: Rotates the camera.
[中间鼠标按钮]: 旋转摄像机。 - [Shift + middle mouse button]: Moves the camera.
[Shift + 中键鼠标]: 移动摄像机。 - [Mouse wheel] or [control + middle mouse button]: Zooms in/out
[鼠标滚轮] 或 [Ctrl + 中键鼠标]: 缩放
When you select an object, it will be highlighted with an orange outline. With the cube selected:
当你选择一个对象时,它会用橙色的轮廓高亮显示。以选择立方体为例:
- Press G and move the cube with your mouse, then click to confirm.
按下 G 键并用鼠标移动立方体,然后点击确认。 - Press S and move the cursor away or towards the cube to scale it up or down, then click to confirm.
按下 S 键并用光标远离或靠近立方体以放大或缩小它,然后点击确认。 - Press R and move the cursor around the cube to rotate it, then click to confirm.
按 R 键并移动光标在立方体周围以旋转它,然后点击确认。
- You can also press Enter to confirm. If you want to cancel, press Esc.
您也可以按 Enter 键进行确认。如果要取消,按 Esc 键。 - Press X and confirm to delete the cube.
按 X 键并确认以删除立方体。 - Press [ctrl + Z] to undo your changes. To redo them, press [ctrl + shift + Z].
按 [ctrl + Z] 撤销您的更改。要重做,请按 [ctrl + shift + Z]。
These are the most basic, bare-bones controls in Blender. Additionally, you can move, scale, or rotate around one axis only (by pressing [X/Y/Z] before confirming) or around two axes (by pressing [Shift + the key for the axis you don’t want] before confirming).
这些是 Blender 中最基础、最简单的控制方式。此外,您还可以仅沿一个轴移动、缩放或旋转(在确认前按下[X/Y/Z]),或者沿两个轴旋转(在确认前按下[Shift + 您不想使用的轴的键])。
Another method of precise modifications is selecting the Move, Rotate, or Scale tools on the left, then use the gizmo and drag it in the direction we want.
另一种精确修改的方法是,在左侧选择移动、旋转或缩放工具,然后使用 gizmo 并将其拖动到所需的方向。

Now let’s get down to editing the model. With the cube selected, on the upper left corner of the viewport, you can see what mode you’re currently in. Click where it says ‘Object Mode’ and change it to Edit Mode. You can also press Tab to hop in and out of Edit mode.
现在让我们进入模型编辑阶段。选中立方体后,在视图窗口的左上角,您可以看到当前所处的模式。点击显示为“Object Mode”的位置,并将其更改为“Edit Mode”。您也可以按 Tab 键在编辑模式和物体模式之间切换。

Edit mode is also where you can manipulate vertices, edges, and faces however you want. If you don’t know what these are, in the following square, vertices are marked in red, edges in green, and the face in blue:
在编辑模式中,您可以随意操作顶点、边和面。如果您不知道这些是什么,在接下来的正方形中,顶点用红色标记,边用绿色标记,面用蓝色标记:

We’ll stick to vertices for now. Controls in Edit mode are basically the same as we saw before in Object mode: G to move, S to scale, R to rotate.
我们现在先关注顶点。在编辑模式下的控制基本上和物体模式下看到的控制方式相同:G 用于移动,S 用于缩放,R 用于旋转。
Weight painting 权重绘制
Weights are the common name for what is actually called ‘vertex groups’ (VGs) which are assigned to the model through the act of weight painting and determine the movement of the model. Knowing how they work and how to weight paint is essential to make somewhat complex mods, but if you read this and find it too complicated of a topic, feel free to skip this section and revisit it later.
权重实际上是被称为“顶点组”(VGs)的常见名称,它们是通过权重绘制分配给模型的,并决定了模型的运动。了解它们的工作原理以及如何进行权重绘制对于制作较为复杂的模组是必不可少的,但如果你觉得这个主题太复杂,可以自由跳过这一节,稍后再回来阅读。
Now, go down to the properties panel on the right side of the screen and click on the data tab, which is this green triangle:
现在,向下移动到屏幕右侧的属性面板,并点击数据标签,也就是这个绿色三角形:

For now, we’ll ignore everything else and focus on VGs. These are collections of vertices in a mesh that are assigned to a named group and they’re mainly used for rigging and animation. Although often used interchangeably with ‘weights,’ technically, weight is more like a value, whereas VGs are the units that the value is assigned to.
目前,我们将忽略其他内容,专注于顶点组(VGs)。这些是网格中被分配到命名组的顶点集合,主要用于绑定和动画制作。虽然“权重”和“顶点组”经常被混用,但从技术上讲,权重更像是一个数值,而顶点组则是这个数值所分配的单位。
Let’s enter Weight Paint mode – remember, it’s the same way you would enter Edit mode or Object mode. The cube should now turn dark blue. This color means that there is no weight assigned to any of its vertices. Now, create a vertex group by clicking the [+] button, right side on the Vertex groups dropdown, and use your brush to paint every vertex of the cube until it’s red, like so:
让我们进入权重绘制模式 – 请记住,这是与进入编辑模式或物体模式相同的方式。此时立方体应该变成深蓝色。这种颜色表示该立方体的任何顶点都没有被分配权重。现在,点击顶点组下拉菜单右侧的[+]按钮,创建一个顶点组,并使用你的画笔为立方体的每个顶点绘制,直到它们变成红色,如下所示:

Dark blue means the weight value assigned to a vertex is 0, while red indicates a value of 1, which is the maximum that can be assigned. The more red, the higher the weight. Everything between 0 and 1 will look a different blend of blue and red: a value of 0.25 will look teal, 0.5 green, and 0.75 yellow.
深蓝色表示顶点的权重值为 0,而红色表示权重值为 1,这是可以分配的最大值。红色越多,权重越高。在 0 到 1 之间的所有值都会呈现出不同混合的蓝红色调:0.25 的值看起来是青色,0.5 是绿色,0.75 是黄色。
Every bone of a character’s skeleton has a vertex group assigned to it: neck, head, torso, feet, hands, etc. The weight assigned to a vertex indicates how much it will move like its corresponding bone when in-game. With a value of 0, the bone will not affect the movement of the vertex or vertices at all; with a value of 1, it will move exactly like the bone is meant to move. We cannot see the skeleton (though there are ways to do it), but we can assume that if there’s a VG assigned painted on the left wrist, we can assume its bone will be the left wrist.
每个角色骨架的骨头都有一个顶点组分配:脖子、头部、躯干、脚部、手部等。顶点的权重表示它在游戏中会像对应的骨头一样移动的程度。权重值为 0 时,骨头不会影响顶点或顶点组的任何移动;权重值为 1 时,顶点会完全按照骨头应有的方式移动。我们无法看到骨架(尽管有办法做到这一点),但我们可以假设,如果在左手腕上有绘制了顶点组,那么我们可以认为其对应的骨头就是左手腕。
And no, 3D model skeletons aren’t the same as real life skeletons. These skeletons also cover clothes, hair, and sometimes will have more bones where a real skeleton would have less and vice versa. This changes from game to game, but in Wuwa, models happen to be quite detailed. Here’s Changli’s as an example:
而且,3D 模型的骨架和现实中的骨架并不相同。这些骨架也会包括衣物、头发,有时会在现实中骨头较少的地方增加更多骨头,反之亦然。这种情况会因游戏而异,但在 Wuwa 中,模型往往相当详细。例如,Changli 的模型就体现了这一点:

So the gist of it is that for each bone, there’s a vertex group painted around it. Simple, right? Well, not so much. If we were to paint values of 1 to each vertex, like we did with our cube, animations would look very stiff. In reality, vertex groups are smoothened out and overlap with others close to them, some more than others depending on the part of the body.
所以,简而言之,每个骨骼周围都有一个顶点组被绘制。简单,对吧?其实不然。如果我们像在立方体上那样,给每个顶点都绘制 1 的值,动画看起来会非常僵硬。实际上,顶点组会被平滑处理,并与其他邻近的顶点组重叠,重叠的程度取决于身体的部位。
Here’s an example. Notice how these weights aren’t straight up red, but mostly green. This is because they’re overlapping smoothly, the sum of their values always amounting to 1 for every vertex. But how do we achieve that?
举个例子。请注意这些权重并不是纯红色,而是大部分为绿色。这是因为它们平滑地重叠,每个顶点的值总和始终为 1。但我们要如何实现这一点呢?
Let’s go back to our cube and create a second VG. This time, select the gradient tool on the left of your screen, then click and drag to paint a gradient like in the following image. After that, on the upper left corner of the screen, select Weights > Normalize all:
让我们回到我们的立方体,并创建一个第二个 VG。这次,选择屏幕左侧的渐变工具,然后点击并拖动以绘制一个渐变,如下面的图片所示。之后,在屏幕左上角选择权重 > 归一化所有:

Like the description says, this will ensure every vertex has a total weight value of 1. Since we have the second vertex group selected, by default Blender will lock it and change the value of all other unlocked VGs. If we look at our first vertex group, it should look something like this:
正如描述所说,这将确保每个顶点的总权重值为 1。由于我们选中了第二个顶点组,Blender 默认会锁定它,并改变所有未锁定的其他 VG 的值。如果我们查看我们的第一个顶点组,它应该看起来像这样:

And that’s how you weight paint! There are multiple ways to paint, and usually it won’t be so simple. But in the end, it all comes down to locking all vertex groups you want unchanged and then selecting Normalize all. Think of it like a sort of whack-a-mole game, but with a limit on the total distance that moles can stick their heads out, and depending on how hard you hit a mole, others will come out farther (maybe I’m reaching here).
这就是权重绘制的方法!有很多种绘制方式,而且通常不会这么简单。但最终,一切都要归结于锁定所有你不希望改变的顶点组,然后选择“归一化所有”。可以把它想象成一种“打地鼠”游戏,只不过地鼠冒出的总距离是有限制的,而且你打的越用力,其他地鼠就会冒出得越远(也许我有点夸张了)。
Actual modding 实际模组制作
Now that we’ve covered basic editing and weight painting, it’s time to open Wuwa with mods enabled if it already isn’t, and start tinkering with WWMI Tools. Also, you can delete the cube, camera, and light that Blender adds automatically as a template.
现在我们已经介绍了基本的编辑和权重绘制,接下来如果你还没有启用模组,就打开 Wuwa 并启用模组,然后开始使用 WWMI Tools 进行调整。此外,你也可以删除 Blender 自动添加的立方体、相机和灯光作为模板。
In the upper right corner of the viewport, click on the small arrow pointing left or press N to open the sidebar, then select the WWMI Tools tab.
在视口的右上角,点击指向左边的小箭头或者按下 N 键打开侧边栏,然后选择 WWMI Tools 标签页。


Dumping
We’ll start by dumping a character model. The reason that knowing how to dump is important is because sometimes you might find a model that you want but isn’t available to download anywhere, or maybe one of your mods broke after an update. It’s really easy to do.
我们将从导出一个角色模型开始。知道如何导出模型很重要,因为有时候你可能会找到一个想要的模型,但无法从任何地方下载,或者你的某个模组在更新后损坏了。这个过程非常简单。
In XXMI Launcher, go to the WWMI settings and make sure that the ‘Enable Hunting’ box is checked.
在 XXMI 启动器中,进入 WWMI 设置并确保勾选了“启用狩猎”选项。
When you’re in the game, turn on dev mode by pressing 0 on your numpad. If your keyboard is TKL – that is, it doesn’t have a numpad – you’ll have to use the on-screen keyboard. You can search it from the Windows start menu.
当你在游戏内时,按键盘上的数字小键盘 0 来开启开发者模式。如果你的键盘是 TKL 型号(即没有数字小键盘),则需要使用屏幕键盘。你可以在 Windows 开始菜单中搜索它。

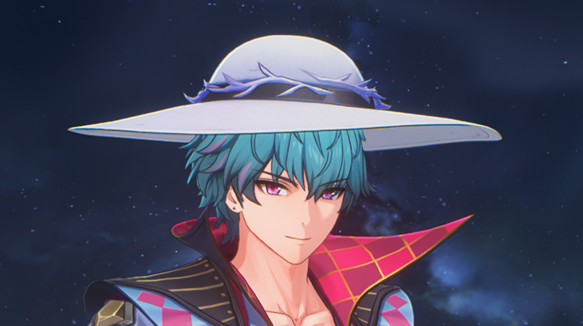
For this guide we’ll dump Brant. If you have him, in Wuwa go to the character screen and select him. If you don’t have Brant, you can go to Gallery > Crossing Stars and select him there. Your screen should look like this:
本教程我们将使用布兰特进行导出。如果你拥有他,在 Wuwa 中进入角色界面并选择他。如果你没有布兰特,可以前往画廊 > 跨越星辰并在此处选择他。你的界面应该如下所示:

Press F8 to start the dump. This will freeze the game for a few seconds. When it starts running again, you’ll know the dump is done.
按下 F8 键开始导出。这会使游戏暂停几秒钟。当游戏重新开始运行时,说明导出已经完成。
What this does is essentially a 3D screenshot of everything that’s being loaded on screen and stores it in a folder inside your WWMI installation.
这实际上是对屏幕上加载的所有内容进行 3D 截图,并将其存储在 WWMI 安装目录中的一个文件夹内。
- Note: While we’ll only be extracting models here, you can look into the dump folder if you’re interested in extracting a specific texture in the game that isn’t part of a 3D model (UI, sprites, etc).
注意:虽然我们这里只会提取模型,但如果你对提取游戏中不属于 3D 模型的特定纹理(如 UI、精灵等)感兴趣,可以查看 dump 文件夹。 - Note 2: If you want to dump a model in the overworld (like an NPC), make sure to lower the graphics resolution to a minimum to reduce dump size or it might take too long and crash your game.
注意 2:如果你想在主世界中导出模型(如 NPC),请确保将图形分辨率降低到最低,以减小导出文件的大小,否则可能会导致导出时间过长并使游戏崩溃。
After the dump is done, go on Blender > WWMI Tools and change the mode to ‘Extract objects from dump.’
在导出完成后,进入 Blender > WWMI Tools,并将模式更改为’从导出中提取对象’。

In the first field, Frame Dump, press the folder button and navigate to your dump. Again, it’s in your WWMI installation and it starts with ‘FrameAnalysis’ followed by numbers indicating year, month, day, hours, minutes, and seconds. I highly recommend adding WWMI to bookmarks in Blender’s file explorer, as well as any folders you might use often.
在第一个字段 Frame Dump 中,点击文件夹按钮,导航到你的导出文件。同样,它位于你的 WWMI 安装目录中,并以’FrameAnalysis’开头,后面跟着表示年、月、日、小时、分钟和秒的数字。我强烈建议将 WWMI 添加到 Blender 文件浏览器的书签中,以及你经常使用的任何文件夹。
Then in the second field, Output Folder, select the location where the model(s) will be extracted. I have a dedicated folder for this inside my WWMI folder, named Dump, that you can also create yourself if you want. Note that we’re selecting the location where a folder containing the model files will be created, not the files themselves, so don’t worry about having all the files mixed up.
然后在第二个字段 Output Folder 中,选择模型文件将被提取的位置。我在我的 WWMI 文件夹内有一个专用文件夹,名为 Dump,你也可以自己创建一个。请注意,我们选择的是将包含模型文件的文件夹创建的位置,而不是文件本身,因此不用担心所有文件混在一起。
Finally, click on the ‘Extract objects from dump’ button, and the models in the dump will be automatically extracted to the location you specified. From now on, we’ll refer to the folder where a model is extracted as ‘dump folder’.
最后,点击“从转储中提取对象”按钮,转储中的模型将自动提取到你指定的位置。从现在开始,我们将把提取模型的文件夹称为“转储文件夹”。
Importing objects 导入对象
Now change the mode to ‘Import Object’ and press the folder button next to the ‘Object Source’ field, then navigate to your Dump folder (or wherever you extracted your dump). There should be two folders, with random numbers and letters in their names. Select one of them and click on the ‘Import object’ button.
现在将模式更改为“导入对象”,然后点击“对象来源”字段旁边的文件夹按钮,导航到你的转储文件夹(或你提取转储的位置)。你应该会看到两个文件夹,它们的名称包含随机的数字和字母。选择其中一个文件夹,然后点击“导入对象”按钮。
You might have imported Brant’s compass instead. That’s because he’s holding it in the character screen, so it got dumped too. Whenever you get multiple folders after extracting a dump, you can import them one by one to find out what they are, then rename those you want to keep and delete those you don’t.
你可能导入了 Brant 的指南针。这是因为他在角色界面中拿着它,所以也被转储了。每次提取转储后出现多个文件夹时,你可以逐个导入以确定它们的内容,然后重命名你想要保留的文件夹,并删除不需要的文件夹。
Once you’ve renamed Brant’s dump folder, delete everything in your Blender project, set the object source to the folder you just renamed, and import the model again. In the outliner, the area in the upper right, a collection named after the folder you imported will be created, so if you renamed those random numbers and letters to just ‘Brant’ your collection should be named Brant too. It should contain multiple meshes, named Components 1 to 5. ANything that isn’t named ‘Component X’ will not be exported, and the number in place of X will determine which component that mesh will be a part of.
一旦你将 Brant 的导出文件夹重命名,删除 Blender 项目中的所有内容,将对象来源设置为刚刚重名的文件夹,并重新导入模型。在大纲视图中,右上角的区域会创建一个与导入文件夹同名的集合,因此如果你将那些随机数字和字母重命名为“Brant”,那么你的集合也应该命名为“Brant”。它应该包含多个网格,分别命名为 Components 1 到 5。任何没有以“Component X”命名的物体将不会被导出,而 X 的位置上的数字将决定该网格属于哪个组件。

- Note: Before importing, you’ll normally want to keep the skeleton set to ‘merged’ and click the ‘Import object’ button. A merged skeleton means that the model’s vertex groups (or weights) will be unified across all its components, which makes modding easier. ‘Per component’ is preferred for texture and weapon mods and can sometimes solve issues that you may encounter using merged skeleton, though it makes modding overall more difficult by limiting vertex groups by component (ignore this for now if you don’t know what I’m talking about. We’ll cover this later).
注意:在导入之前,通常希望保持骨架设置为“合并”状态,并点击“导入物体”按钮。合并骨架意味着模型的顶点组(或权重)将在所有组件中统一,这使得模组制作更加容易。对于材质和武器模组,建议使用“每组件”模式,有时可以解决使用合并骨架时可能遇到的问题,尽管它会通过限制每个组件的顶点组而使整体模组制作更加困难(如果你还不了解我在说什么,可以暂时忽略这一点。我们之后会详细讲解)。

Exporting objects 导出对象
Now change mode to Export object. In the ‘Components’ field, choose the Brant collection. In the ‘Mod folder’ field, click the folder button and navigate to your Mods folder in WWMI, then create a new folder for your mod that you can name whatever you want. For example: ‘BrantTest.’
现在将模式更改为导出物体。在“Components”字段中,选择“Brant”集合。在“Mod folder”字段中,点击文件夹按钮,导航到 WWMI 中的 Mods 文件夹,然后为你自己的模组创建一个新文件夹,你可以随意命名,例如:“BrantTest。”
As for anything in Blender, by hovering over all these boxes, you can read what they’re for. My recommendation is that you always check ‘Ignore hidden objects,’ ‘apply all modifiers,’ and uncheck ‘ignore nested collections.’
至于 Blender 中的其他设置,通过悬停在这些框上,你可以看到它们的作用。我的建议是,你总是勾选“忽略隐藏物体”和“应用所有修改器”,并取消勾选“忽略嵌套集合”。
You can ignore the rest of the settings for now. Now, press ‘Export mod.’
你可以暂时忽略其余的设置。现在,点击“导出模组”。

The mod we just exported is simply Brant’s default model, so the way we can tell the mod is working is by pressing F6, which is the key that toggles mods on and off. If you notice a quick distortion when you press it, it means the mod was exported successfully. Here’s what it looks like when pressing F6 repeatedly.
我们刚刚导出的模组只是 Brant 的默认模型,因此我们可以通过按下 F6 键来判断模组是否正常工作,F6 键用于开启和关闭模组。如果你在按下该键时注意到短暂的扭曲效果,说明模组已成功导出。这是反复按下 F6 键时的显示效果。
If you don’t see this, then either you haven’t exported it properly or you’re exporting a per component skeleton mod. Make sure mod source and mod folder are set properly, and that the imported model and exported mod are both using merged skeleton.
如果你没有看到这个效果,那么可能是你没有正确导出模组,或者你导出的是一个针对单个部件的骨骼模组。请确保模组源文件和模组文件夹设置正确,并且导入的模型和导出的模组都使用了合并后的骨骼。
We can now uncheck the ‘Copy textures’ box in the export menu. As the name implies, it copies the textures from the dump folder to the mod folder when exporting, but this is only needed once. If you keep this checked and edit the textures later, you will lose your all your work the next time you export the mod – and you won’t find it in the recycle bin.
现在我们可以在导出菜单中取消勾选“复制纹理”框。正如其名所示,导出时该选项会将纹理从 dump 文件夹复制到模组文件夹,但只需要在第一次导出时使用。如果你在之后继续勾选该选项并编辑纹理,下次导出模组时将会丢失所有工作内容,而且你也不会在回收站中找到它们。
- If there’s a texture you’re not going to edit from the character you’re modding (this is usually face, eyes, hair, and tacet mark, but it can be any texture), you can delete it from your dump folder or save it elsewhere, then export with ‘Copy textures’ checked. This way, the mod won’t require that texture, thus reducing file size.
如果你不打算编辑被模组的角色的某些纹理(这通常是面部、眼睛、头发和静默标记,但也可以是任何纹理),你可以从你的导出文件夹中删除它或将其保存到其他位置,然后在导出时勾选“复制纹理”。这样,模组将不需要该纹理,从而减少文件大小。
Deleting parts 删除部件
Now we’ll be editing the model and remove Brant’s hat. In Object mode, select the hat. You’ll notice that the legs and arms are also being selected. Sometimes you’ll find separate parts of the body that belong to the same component.
现在我们将编辑模型并移除 Brant 的帽子。在物体模式下,选择帽子。你会注意到腿部和手臂也会被一同选中。有时你可能会发现属于同一部件的不同身体部分。

Now, enter Edit mode and press [alt + Z] to toggle x-ray view, which allows us to select vertices that aren’t visible from our point of view, like the vertices in the back of the hat.
现在,进入编辑模式并按下 [alt + Z] 切换 X 光视图,这样我们就可以选择那些从当前视角不可见的顶点,比如帽子后面的顶点。

Select all the vertices of his hat and right click > Separate > Selection (or press P > Selection). This will make the hat a separate object, named Component 4.001. You can rename it to whatever you want for convenience. Since we checked the box ‘ignore hidden objects,’ we can hide it by clicking on the eye icon on the right. Then press export.
选择他帽子上的所有顶点,右键点击 > 分离 > 选择(或者按下 P > 选择)。这将使帽子成为一个独立的对象,命名为 Component 4.001。你可以为了方便将其重命名为你想要的名称。由于我们勾选了“忽略隐藏对象”选项,我们可以通过点击右侧的眼睛图标来隐藏它。然后点击导出。

Once exported, go back to Wuwa and press F10 to reload, and the hat should now be gone.
导出完成后,返回 WuWa 并按下 F10 重新加载,此时帽子应该已经不见了。
Adding parts 添加部件
Removing something is easy, but adding to a model is a completely different thing. For this example, we’ll make a bit of a goofy mod and put Phoebe’s hat on Brant.
移除某些东西很简单,但向模型中添加内容则是完全不同的事情。在这个例子中,我们将做一个有点傻乎乎的模组,把 Phoebe 的帽子放到 Brant 的头上。
Open a new instance of Blender and dump Phoebe’s model following the steps before. After that, in our previous project where we hid Brant’s hat, import Phoebe’s model, then, in Export mode, set the Object source to the Brant dump folder again. This is because when you import a new model, the location of that model will overwrite the previous Object Source.
打开一个新的 Blender 实例,并按照之前的步骤导出 Phoebe 的模型。之后,在我们之前隐藏 Brant 帽子的项目中,导入 Phoebe 的模型,然后在导出模式下,将对象来源再次设置为 Brant 的导出文件夹。这是因为当你导入一个新模型时,该模型的位置会覆盖之前的对象来源。
Separate Phoebe’s hat the same way that we did with Brant’s, but this time we want to delete every Phoebe component except for her hat. Select it and enter Edit mode, then press A to select all vertices and move the hat so that it fits right on Brant’s head.
用与 Brant 相同的方式分离 Phoebe 的帽子,但这次我们希望删除 Phoebe 模型中除帽子以外的所有部件。选择帽子并进入编辑模式,然后按 A 选择所有顶点,将帽子移动到正好适合 Brant 头部的位置。
Let’s also delete the parts of Phoebe’s model that aren’t her hat, namely the bow, the hairpin, and the straps (Brant doesn’t care if his hat falls). To do that, press L while hovering over the surface you want to delete, then press X to delete. Repeat until everything except for the actual hat is gone.
我们还应该删除 Phoebe 模型中不属于帽子的部分,即发带、发夹和肩带(Brant 不介意他的帽子掉下来)。要做到这一点,将鼠标悬停在要删除的表面上并按 L,然后按 X 删除。重复此操作,直到只剩下真正的帽子。
With Phoebe’s mesh cleaned up, drag it into the Brant collection in the Outliner (upper right area in Blender). Make sure everything you want to be in the mod is in the Brant collection and unhidden. Now, export it.
在 Phoebe 的网格清理完毕后,将其拖入 Blender 中 Outliner(右上角区域)的 Brant 集合中。确保你希望包含在模组中的所有内容都在 Brant 集合中并且未隐藏。现在,导出它。

This doesn’t looks very good. But don’t worry, I intentionally skipped some steps. There are two things we have to do to fix it: match the hat’s VGs with Brant’s, and incorporate Phoebe’s textures.
这看起来不太好看。不过别担心,我故意跳过了某些步骤。要修复它,我们需要做两件事:将帽子的 VGs 与 Brant 的匹配,并整合 Phoebe 的材质贴图。
Matching vertex groups 匹配顶点组
First, select Phoebe’s hat and go to the data tab in the properties panel (again, the green triangle). The VGs on the list are ALL the vertex groups for Phoebe’s Component 4, not just for the hat, so it’s better to get rid of the clutter. With the hat selected, change to Toolbox mode in the WWMI Tools side menu and click on ‘Remove unused vertex groups.’ This way we can work only with the VGs that are present in our mesh, which is much more convenient.
首先,选择 Phoebe 的帽子,然后在属性面板的数据标签(再次强调,是绿色三角形)中进行操作。列表中的 VGs 是 Phoebe 的组件 4 的所有顶点组,而不仅仅是帽子的,因此最好先清理掉杂乱的部分。在选中帽子的情况下,切换到 WWMI 工具侧边栏的工具箱模式,并点击“移除未使用的顶点组”。这样我们就可以只使用网格中存在的 VGs,更加方便。
Unhide Brant’s hat and, in Object mode, move it aside and remove its unused vertex groups as well. You probably noticed that the wing of Phoebe’s hat in game was moving incorrectly, but the base was fine in its place.
取消隐藏 Brant 的帽子,并在物体模式下将其移开,同时也要移除其未使用的顶点组。你可能已经注意到,在游戏中 Phoebe 的帽子翅膀移动不正确,但基础部分却保持在正确的位置。
If you look at Brant’s and Phoebe’s head VGs, you’ll notice that both are tagged as 0.
如果你查看 Brant 和 Phoebe 的头部 VGs,你会发现它们都被标记为 0。

And that shouldn’t really be a surprise. I would say most character’s head VGs are number 0. However, what’s a rare coincidence is that both their hats main VGs are number 218.
这其实并不令人意外。我会说大多数角色的头部顶点组(VG)都是编号 0。然而,一个罕见的巧合是,他们的帽子主顶点组都是编号 218。

What does this mean? Well, you could check yourself, but I’ll spare you the trouble: in both models, both VGs 0 and 218 have the exact same animations. I’d say VG 218 is pretty unnecessary and you could use the same VG for the hat and the head, but they probably had their reason when making these models.
这意味着什么?你可以自己检查,但我会省去你的麻烦:在两个模型中,顶点组 0 和 218 都有完全相同的动画。我认为顶点组 218 其实并不必要,你可以用同一个顶点组来处理帽子和头部,但制作这些模型时他们可能有自己的考虑。
What I’m getting at is that basically, Phoebe’s main hat VG is the same number as Brant’s main hat VG, and the latter also moves exactly like VG 0 which is his head VG. So Phoebe’s hat ends up moving along with Brant’s head, with not as much issue as in most other cases of model porting where the hat would probably get distorted like crazy. Keep this in mind if you plan on making more model ports.
我的意思是,基本上,Phoebe 的帽子主顶点组编号与 Brant 的帽子主顶点组相同,而后者也与顶点组 0(即他的头部顶点组)移动方式完全一致。因此,Phoebe 的帽子会随着 Brant 的头部一起移动,不像大多数其他模型移植情况下帽子可能会严重变形。如果你计划进行更多的模型移植,这一点值得记住。
That aside, we still have plenty of other VGs on Phoebe’s hat. You could try and match Brant’s hat rigging on Phoebe’s hat rigging, but given that hats look good enough with no bending, it’s not worth the effort. Therefore, we’ll simplify things and assign all the vertices in Phoebe’s hat to VG 0.
除此之外,Phoebe 的帽子上还有许多其他的顶点组。你可以尝试将 Brant 的帽子骨骼绑定匹配到 Phoebe 的帽子上,但考虑到帽子本身看起来已经足够自然,不需要弯曲,这样做并不值得。因此,我们将简化处理,把 Phoebe 帽子上的所有顶点都分配到顶点组 0。
To do that, select all vertices in Edit mode, then select VG number 0, and with Weight set to 1, click Assign.
为此,进入编辑模式后选择所有顶点,然后选择 VG 编号 0,将权重设为 1,点击分配。

If you enter weight paint mode, you’ll see that VG number 0 looks completely red now, which, again, means that the whole hat will move along with Brant’s head. But there are many other VGs assigned to the hat. To get rid of those, select VG number 0 and then go to Weights > Normalize all, then in Toolbox mode again, select ‘Remove unused vertex groups.’
如果你进入权重绘画模式,你会发现 VG 编号 0 现在看起来完全呈红色,这意味着整个帽子都会随着 Brant 的头部一起移动。但帽子上还有许多其他 VG 被分配了权重。要删除这些,选择 VG 编号 0,然后进入权重 > 正规化所有,接着在工具箱模式下,选择“移除未使用的顶点组”。
- Another way to do it is by deleting every VG but 0. In the vertex groups list, press the lock next to VG number 0, then click on the small button with an arrow pointing down on the right and click ‘Delete all unlocked groups.’
另一种方法是删除除 VG 0 以外的所有顶点组。在顶点组列表中,点击 VG 编号 0 旁边的锁定按钮,然后点击右侧箭头向下的小按钮,并选择“删除所有已解锁的组”。 - Another way to do this (more tedious, but still good to know) is renaming every VG to 0, then merging them. To rename a VG, double click it. You can also copy the number 0 and press [ctrl + V] while hovering over all VGs you want to rename. To merge them, in Toolbox mode, select ‘Merge Vertex Groups.’
另一种方法(更繁琐,但同样值得了解)是将每个 VG 重命名为 0,然后合并它们。要重命名 VG,双击它即可。你也可以复制数字 0,然后在悬停所有想要重命名的 VG 时按下[ctrl + V]。要合并它们,请在工具箱模式下,选择“合并顶点组”。
Now, hide Brant’s hat again or move it outside of the Brant collection so that it’s not included in the exported mod. With all our VGs unified, let’s export our mod.
现在,再次隐藏 Brant 的帽子或将它移出 Brant 的集合,这样它就不会被包含在导出的模组中。在所有 VG 统一之后,我们可以导出我们的模组了。

It’s not distorted anymore, but it’s still looking messy. That’s because we still haven’t set up the textures for Phoebe’s hat, so let’s do just that.
它不再变形了,但看起来仍然很杂乱。这是因为我们还没有为 Phoebe 的帽子设置纹理,所以现在我们来设置一下。
Adding textures 添加纹理
Since I didn’t explain this earlier, I’ll do it now. Each of these tabs is a workspace, which every new project comes with by default. These are only presets, and anything you can do in one, you can also do in another. They’re like rooms in a house, each with each their own furniture and stuff, dedicated to a specific activity. Nothing is stopping you from doing everything in the same room, but depending on what you want to do, it might just be more convenient to switch to another room.
由于我之前没有解释这一点,现在我来说明。每个选项卡都是一个工作区,每个新项目默认都会包含这些工作区。这些只是预设,你可以在其中一个工作区完成的操作,也可以在另一个工作区完成。它们就像房子中的房间,每个房间都有自己的家具和物品,专门用于特定的活动。没有什么能阻止你在一个房间中完成所有操作,但根据你想要做什么,切换到另一个房间可能更方便。
With that out of the way, go to the ‘UV Editing’ workspace at the top of your screen.
在处理完这些之后,前往屏幕顶部的“UV 编辑”工作区。

In the right window, select all vertices, and in the left window, click on the button with two arrows in the upper left corner, the UV sync selection button. This syncs your selection on both sides, so if you select one vertex on the UV map, you’ll also select it on the viewport. This is just more convenient to work with most of the time.
在右侧窗口中,选择所有顶点,然后在左侧窗口点击左上角的两个箭头按钮,即 UV 同步选择按钮。这个功能会将你的选择同步到两侧,因此如果你在 UV 贴图中选择了一个顶点,它也会在视图窗口中被选中。这在大多数情况下会更加方便。


To preview our textures on our model before exporting, we will add a material. Each component uses a specific texture image, and since we’re adding Phoebe’s hat as Component 4, we need to make a new texture file that will work for both the hat and the body.
在导出模型之前,我们将在模型上添加材质以预览纹理。每个组件使用特定的纹理图像,由于我们正在为 Phoebe 的帽子添加作为第四个组件,因此我们需要创建一个新的纹理文件,使其适用于帽子和身体。
In the properties panel on the right, click on the red circle, the ‘material properties’ tab, and then click on ‘New’.
在右侧的属性面板中,点击红色圆圈,选择“材质属性”标签,然后点击“新建”。

Then with a Principled BSDF surface, click on the yellow dot, then select ‘Image Texture.’
然后使用 Principled BSDF 表面,点击黄色圆点,然后选择“图像纹理”。

Click ‘Open.’ The file explorer will be opened to select the texture you want to add. If you’re not already there, navigate to the Brant mod folder (not the dump/extracted) and look for this DDS file. Since the component we’re adding the texture for is Component 4, you want to look for images with names that start with Components-4 by hovering over the file names until you find the right one.
点击“打开”。文件资源管理器将打开以选择要添加的纹理。如果你不在该文件夹中,请导航到 Brant 模组文件夹(不是 dump/extracted 文件夹),并寻找这个 DDS 文件。由于我们要为组件 4 添加纹理,因此需要寻找以 Components-4 开头的图片文件,悬停在文件名上直到找到正确的文件。

- Sometimes, if you can’t find your texture among those, you want to look at other files that contain the number of the component, not necessarily those that start with it (e.g.: Components-0-1-2-3-4).
有时,如果你在这些文件中找不到你的纹理,你可能需要查看包含组件编号的其他文件,而不仅仅是那些以它开头的文件(例如:Components-0-1-2-3-4)。
In Object mode, select Brant’s original component 4 mesh and, instead of adding a new material, click on the button on the left and select the material we just added to Phoebe’s hat.
在对象模式下,选择 Brant 的原始组件 4 网格,而不是添加新材质,点击左侧的按钮并选择我们刚刚添加到 Phoebe 帽子上的材质。
To get rid of the transparency, go to the surface tab of the material and change alpha from ‘straight’ to ‘none.’
去掉透明度,前往材质的表面标签页,将 alpha 从’straight’改为’none’。

If you’re wondering why you can’t see your textures in the viewport, that’s because you have to change the object color under the Overlays dropdown:
如果你想知道为什么在视图窗口中看不到你的贴图,那是因为你需要在 Overlays 下拉菜单中更改对象颜色:

Now that our textures are all set up, with Brant’s Component 4 selected, hold shift and select Phoebe’s hat, then enter Edit mode. You’ll notice that Brant’s UVs line up perfectly with the texture, but Phoebe’s don’t. To fix this, we need to do two things: make a new image texture containing both Brant’s and Phoebe’s textures, and fit both their UV maps in a way that line up with them.
现在我们的贴图已经设置好了,选择 Brant 的 Component 4,按住 Shift 键并选择 Phoebe 的帽子,然后进入编辑模式。你会发现 Brant 的 UV 贴图与贴图完美对齐,但 Phoebe 的则没有。要解决这个问题,我们需要做两件事:创建一个包含 Brant 和 Phoebe 贴图的新图像贴图,并以一种与它们对齐的方式调整两者的 UV 贴图。
I’ll start by making a new image using Photoshop. Go to your mod folder again and open the Component 4 texture with Photoshop. When opening this type of files, always check the box ‘Load Transparency as Alpha Channel’, so that we don’t get to see the transparency and instead Photoshop stores it in its own channel.
我将先使用 Photoshop 创建一个新图像。再次前往你的模组文件夹,用 Photoshop 打开 Component 4 的贴图。在打开此类文件时,始终勾选’将透明度作为 Alpha 通道加载’的选项,这样我们不会看到透明度,而是让 Photoshop 将其存储在自己的通道中。

Click on ‘Image’ in the upper left corner, select canvas size, change the width from 2048 to 4096 and set the anchor point to the middle left cell, then click OK.
点击左上角的’Image’,选择画布大小,将宽度从 2048 改为 4096,并将锚点设置为左中单元格,然后点击确定。

Now we need to add Phoebe’s texture, which also happens to be Component 4, so we look for the fours again. But don’t drag it onto our Photoshop project; instead open it with Photoshop so that a new project is created.
现在我们需要添加 Phoebe 的材质,这也恰好是组件 4,所以我们再次寻找数字 4。但不要将其拖到 Photoshop 项目中;而是用 Photoshop 打开它,这样会创建一个新的项目。
In our new project with Phoebe’s texture, press [ctrl + A] to select the whole canvas, then [ctrl + C] to copy. Back to Brant’s texture, press M to toggle the selection tool and, at the top of the screen, change the selection style to ‘fixed ratio’ and make sure it’s set to 1:1.
在我们新创建的 Phoebe 材质项目中,按下[ctrl + A]选择整个画布,然后按下[ctrl + C]复制。回到 Brant 的材质中,按下 M 切换选择工具,在屏幕顶部将选择样式改为’固定比例’,并确保设置为 1:1。

Now click outside of the upper right corner of the canvas and drag it all the way down to the lower left corner to have a perfect square selection that covers our whole blank space. Press [ctrl + V] to paste Phoebe’s texture, and voila: A new layer will be created, fitting perfectly into the blank space.
现在点击画布右上角外部并将其拖动到底部左上角,以获得一个完美的正方形选择,覆盖我们整个空白区域。按下[ctrl + V]粘贴 Phoebe 的材质,这样就完成了:一个新的图层将被创建,并完美地适配空白区域。

If your Phoebe texture looks a bit darker, you got the wrong image. Some characters have two texture images for the same component, where one is darker than the other. I don’t know what they’re for; just stick with the right one that’s not dark.
如果你的 Phoebe 纹理看起来有点暗,那你就选错了图片。有些角色对于同一个部件有两个纹理图片,其中一个比另一个更暗。我不知道它们的用途是什么,只要使用那个不暗的正确图片就可以了。
We got our texture colors ready, but we also need to copy the alpha – i.e. the transparency, which Wuwa uses for forced shadows. Go back to Phoebe’s project and, in the channels tab, select the alpha channel.
我们已经准备好了纹理颜色,但我们也需要复制透明度——也就是 Wuwa 用来强制阴影的部分。回到 Phoebe 的项目中,在通道标签里选择透明度通道。

With the whole canvas selected, copy Phoebe’s entire alpha channel. Then in Brant’s project open the alpha channel, select the right half of the canvas like we did before, and paste it. Finally, save the image as DDS and make sure your settings look like this, then press OK.
在选中整个画布后,复制 Phoebe 的整个透明度通道。然后在 Brant 的项目中打开透明度通道,像之前那样选择画布的右半部分并粘贴。最后,将图片保存为 DDS 格式,并确保你的设置看起来像这样,然后点击确定。

Fixing UV maps 修复 UV 图
Now we need to fix our UV map, so go back to Blender, select Phoebe’s hat in Object mode, and enter Edit mode. In the UV Editor, press [alt + R] to update the image to the edited texture we made before (or select Image > Reload).
现在我们需要修复我们的 UV 映射,所以回到 Blender,以物体模式选择 Phoebe 的帽子,然后进入编辑模式。在 UV 编辑器中,按下[alt + R]来更新图片为之前制作的编辑后的纹理(或者选择图像 > 重新加载)。
At the top of the viewport, select Add > Plane. In the UV Editor, select all vertices and use the transform tool to drag the left edge to the right and, type ‘.5’ before confirming, then delete the plane. Here’s a demonstration.
在视图顶部,选择添加 > 平面。在 UV 编辑器中,选择所有顶点,使用变换工具将左边缘向右拖动,输入’.5’后再确认,然后删除该平面。以下是演示。
After that, do the same for Brant’s Component 4 mesh but to the other side.
之后,对 Brant 的组件 4 网格做同样的操作,但方向要相反。
Once UVs are fixed, let’s export the mod and see how it looks.
一旦 UV 调整完成,让我们导出这个模组并看看效果如何。

This still doesn’t look quite right. This is because we also have to change the normal map, which is the dark yellow texture, and the lightmap, the green and orange texture. The same way every component has a color texture (called diffuse), every component also has a normal map, though not every component has light map.
这仍然看起来不太对。这是因为我们还需要更改法线贴图,也就是暗黄色的纹理,以及光照贴图,即绿色和橙色的纹理。每个组件都有一个颜色纹理(称为漫反射),每个组件也都有一个法线贴图,不过并不是每个组件都有光照贴图。
These determine how the game lighting is rendered on the surface of the model. Normal maps are a bit complex and I’m not an expert on the matter, but I will say that the blue areas are used to create a metallic sort of texture, whereas everything else should be ocre. Alpha also affects normal map shading, but I tend to unify it with the same shade of white, which usually results in normal shading.
这些决定了游戏在模型表面上的光照渲染方式。法线贴图有点复杂,我不是这方面的专家,但我会说蓝色区域用于创建金属质感,而其他部分则应使用橙色。Alpha 也会影响法线贴图的明暗效果,但通常我会统一使用相同的白色明暗,这通常会产生正常的明暗效果。
Light maps are much more simple: orange is for skin, green is for non-skin surfaces like clothes, and there’s also a blend of both used for things like tights (visible in Phoebe’s light map).
光照贴图要简单得多:橙色用于皮肤,绿色用于非皮肤表面,如衣物,而两者混合则用于如紧身裤等物体(在菲比的光照贴图中可见)。
Repeat the same process we did before when editing the diffuse texture but with the normal maps for Component 4. For the light maps, you want to resize canvas width to 2048 instead of 4096, and also you don’t have to worry about the alpha channel.
重复之前编辑漫反射贴图时所做的相同过程,但这次使用 Component 4 的法线贴图。对于光照贴图,你需要将画布宽度调整为 2048 而不是 4096,而且你也不必担心 Alpha 通道。
Also, when saving these two types of textures, use a ‘Linear’ compression method.
另外,保存这两种类型的贴图时,请使用“线性”压缩方法。

Remember that ‘Linear DX11+’ is for normal maps and light maps and ‘sRGB DX11+’ is for diffuse. Fast or fine doesn’t really matter.
记住,’Linear DX11+’ 用于法线贴图和光照贴图,’sRGB DX11+’ 用于漫反射贴图。快或细其实并不重要。
Let’s export the mod one last time.
让我们最后一次导出这个模组。

It should look like this. If yours doesn’t, make sure that you’ve followed every single step. If it does, awesome! You’ve done a proper partial model port. Congrats!
它应该看起来像这样。如果您的不一致,请确保您已经按照每一步操作。如果一致,太棒了!您已经成功完成了一个部分模型的移植。恭喜!
Post script 附言
I suggest you save a new template for your new projects on Blender. To do that, open a new Blender project and make the changes you want to make, then go to File > Defaults > Save Startup File, then Overwrite. In my case, I deleted the cube, the light, and the camera and, in the Viewport Shading menu, turned object color to ‘Texture.’
我建议您在 Blender 中为新项目保存一个新模板。要做到这一点,请打开一个新的 Blender 项目并进行您想要的更改,然后前往 文件 > 默认设置 > 保存启动文件,然后覆盖。在我的情况下,我删除了立方体、灯光和相机,并在视口着色菜单中将物体颜色设置为 ‘纹理’。
If you want to make model ports, you should know most of what’s necessary from this guide. You’ll probably need the MMD Tools addon I linked at the start, plus some other addons depending on how deep you want to search for models, but you’ll find out on your own.
如果你想制作模型端口,你应该从本指南中了解大部分必要的信息。你可能需要我最初链接的 MMD Tools 插件,再加上一些其他插件,具体取决于你想要深入搜索模型的程度,但你也会在实践中自行发现。
If you want to make custom models, I recommend you start by making model ports and, little by little, practice your modeling skills with custom modeled parts here and there. You’ll also want to familiarize yourself with Photoshop on a deeper level. And don’t worry, you don’t need to be an artist nor to have a graphics tablet; you just need to have a good eye for art and the time and patience to hone it.
如果你想制作自定义模型,我建议你先从制作模型端口开始,并逐渐在一些自定义模型部件上练习你的建模技巧。你还需要更深入地熟悉 Photoshop。不用担心,你不需要是艺术家,也不需要有图形数位板;你只需要具备良好的艺术眼光,以及花时间和耐心去培养它。
Additional resources 附加资源
Here are a few recommendations on my part that you might find useful after you’re done with this guide:
以下是我一些建议,你可能在完成本指南后觉得它们有用:
- 2AM on YouTube. He analyzes Wuwa/ZZZ modeling techniques, and there’s a lot to learn from them in terms of texturing, rigging, and optimization as well.
2AM 在 YouTube 上。他分析 Wuwa/ZZZ 的建模技术,从贴图、绑定和优化等方面都有很多值得学习的内容。 - Anime Game Modding Group, the Discord server for modding Wuwa, Genshin, HSR, and ZZZ. There’s lots of resources, like tutorials, assets, tools, as well as channels where you can talk, ask for help, or share your creations.
动漫游戏模组群组,Wuwa 的 Discord 服务器,包括 Wuwa、Genshin、HSR 和 ZZZ 的模组。这里有大量资源,如教程、素材、工具,以及可以交流、寻求帮助或分享作品的频道。 - Aplaybox. Chinese site with thousands of models, both officially distributed and ripped, that you can download for free (most require you to have an account and follow/like/fave).
Aplaybox。一个中文网站,拥有成千上万的模型,包括官方发布的和破解的,你可以免费下载(大多数需要注册并关注/点赞/收藏)。 - Blender Guru’s Blender course. I obviously don’t expect you to watch it all in one go and especially after reading this guide. But if you want to go more in-depth about something in particular, you can skip to the parts that you’re interested in. He explains everything very clearly and in a very pleasant way.
Blender Guru 的 Blender 课程。我显然不期望你一次性看完,尤其是读完本指南之后。但如果你想深入了解某个特定内容,可以跳转到你感兴趣的部分。他以非常清晰且愉快的方式解释了所有内容。
My DMs are also open, in case you’ve got any specific questions or issues, or if you just wanna chat about modding!
我的私信也是开放的,如果你有任何具体问题或遇到困难,或者只是想聊聊模组制作,欢迎随时联系!
Thank you for reading and happy modding!
谢谢阅读,祝你 modding 愉快!